
Snare Cajon
| 08/06/2025 | Written By: Kim Ippolito | Formatted/Edited By: Lauren Ippolito |
Intro
Making a Cajon is a simple and fun project! This blog shows you how to make one.
What is a snare cajon?
A snare cajon is a percussion instrument, which allows you to play multiple drum-like sounds with your hands. The front of the cajon is called the “tapas”, which is a thin material. Behind the tapas is a snare. The back of the cajon has a sound hole, also called a “sound port”. The cajon player can use the cajon to make different sounds, depending on where they tap on the cajon, and whether they use their fingers or palms. This includes making the equivalent sound of a snare drum, a hi-hat, a kick drum, a bass drum, and many others.
creating the body
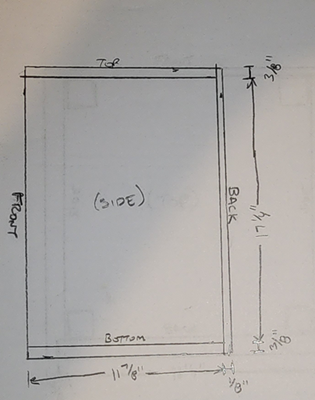
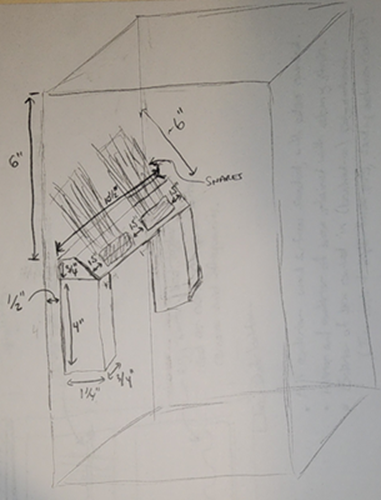
I created the body from a 3’x3’ sheet of ¾” plywood, cut into the top, bottom, sides, and back pieces, and eight 12” strips. The dimensions are shown below.
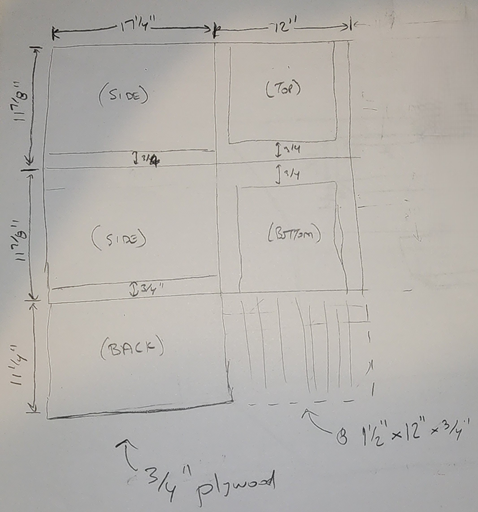
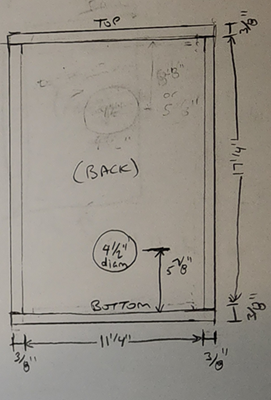
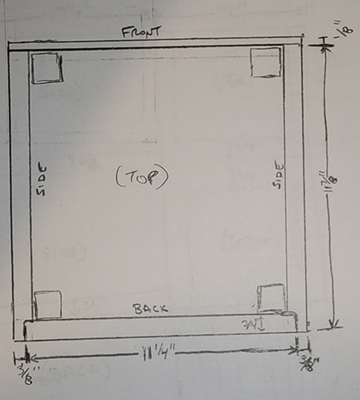
I cut a 4.5” diameter hole in the back piece, with its center located 5 7/8” from the bottom (see Back View below). And I cut a bevel into the two side pieces to make a solid connection with the back piece (see Top View below).
Then I put the pieces together with wood glue, using long clamps.
Then, I sanded all surfaces and rounded the edges.
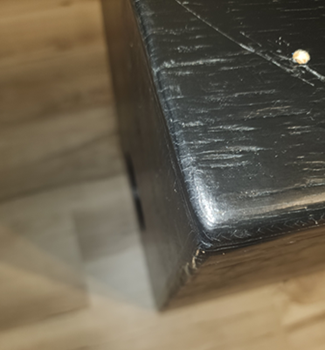
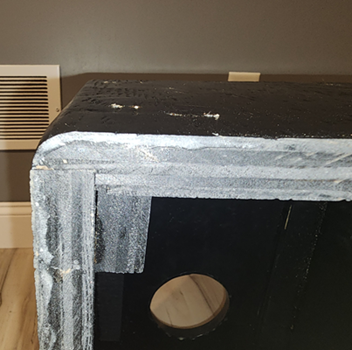
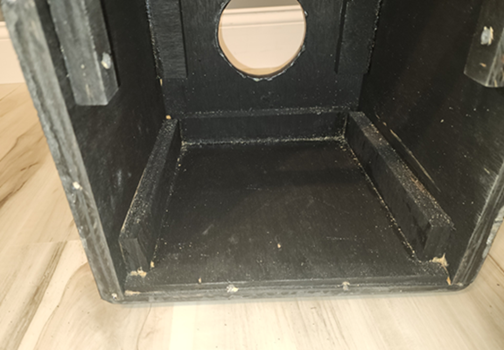
For reference, here are a few pictures of the connected body joints:


Adding Snares
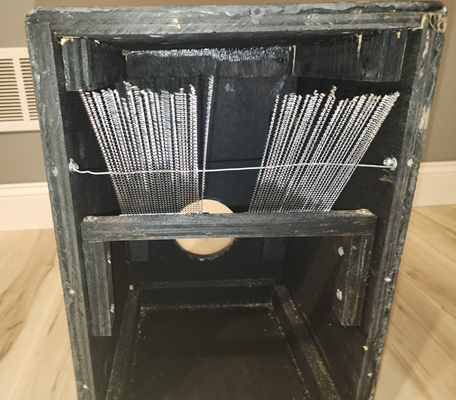
The snares were created from a single snare 12” snare cut into two 6” snares.
The frame to hold the snares were cut and installed, and the snares were attached to the support frame. This is illustrated below.
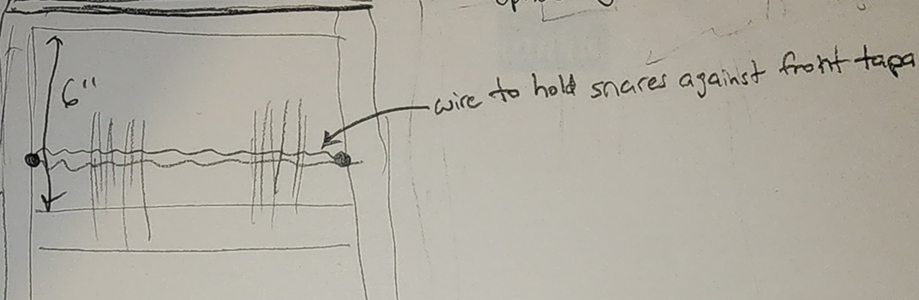
A wire was then installed to hold the snares tight against the front tapa.
Painting the frame
I stained the interior and exterior of the box with ebony stain. Then, I applied two coats of brushed-on triple-thick polyurethane, sanding between coats.
Adding a noise dampener
A noise-dampener was added to remove mid-frequencies. I cut out a piece of an egg carton bed topper, and taped it to the inside of the cajon.
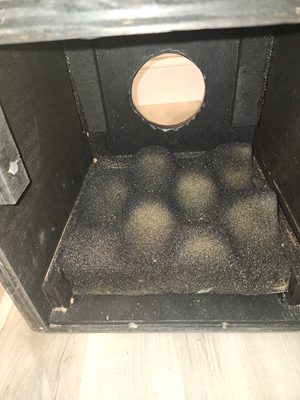
I minimally added some stain to the exterior of the material so that it would blend in when looking through the back hole of the cajon.
Creating the front tapa
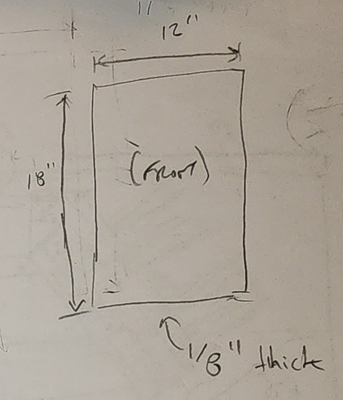
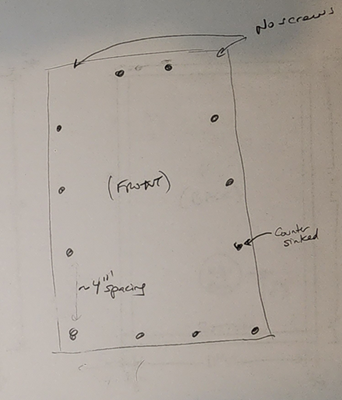
For the front tapa, I cut out a 12” by 18” piece of 1/8”-thick wood. I sanded the wood, applied a little rub-on polyurethane for protection, and then attached it to the front via countersunk screws. For a few of the screws, I included a washer to make sure the hold tight. Locations of the screws are shown below.
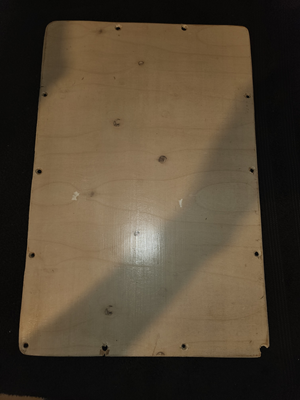
For reference, here are pictures of the front tapa.

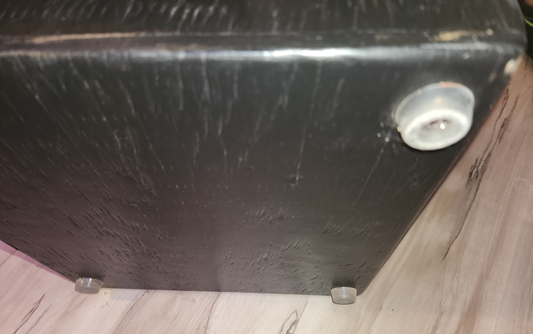
Adding Feet and a Seat
To protect the floors, I installed rubber feet to the bottom of the cajon.
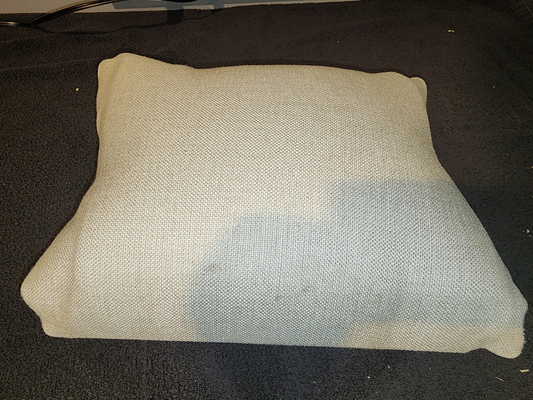
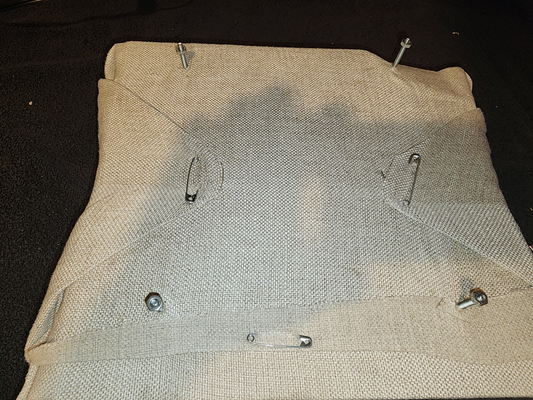
I then created a seat that I can remove via bolts/nuts. The seat was created with a piece of ¼” inch thick wood panel, padding, and fabric. Four bolts were inserted prior to attaching the fabric with safety pins (for easy removal for cleaning). This required adding four holes to top of the cajon for the bolts to go through.
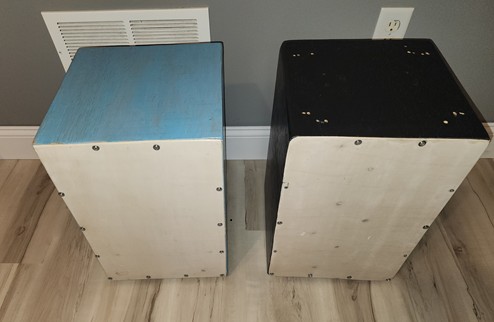
Making Adjustments
After creating two cajons, I was able to evaluate what parameters I could adjust to improve the sound.
From my initial experimentation, the things that made the biggest impact, in order of importance, are:
- Flexibility of front tapa – each piece of tapas wood had a different warping, and different amount of flexibility, causing a noticeable difference in sound quality.
- Angle of the snares – which can increase pressure of the snares on the front tapa.
- Front tapa screw locations and tightness